


Interactive Brokers’ API Support often receive a variety of inquiries from our customers that use one of our Excel API offerings, but don’t necessarily know the underlying code operations behind it. In many cases, we find that some customers are not familiar with how to manipulate the Java DDE code, or modify the C# source inherent to ActiveX or RTD releases. And while Interactive Brokers is looking to provide as many ways to implement our API as possible, not every variable can be accounted for.
As such, this will be one article in a series describing how to build a customized Excel workbook using Python. The series will focus on porting our Python TWS API video series to Excel workbooks, so much of the underlying code can be pulled directly from there before building implementations later. And while we will focus on the original series, it may shift over time to implement reader requests. So please be sure to comment on any ideas you might like to see implemented as we progress.
This first article will cover requesting live market data through the API, so please be familiar with the code from our Python API Market Data tutorial before entering into this Excel series.
Let’s start by taking note of the packages we will be using throughout the article series. For this first article, we will be implementing the Interactive Brokers ibapi library, along with queue, threading, time, and xlwings. Users are welcome to explore more of xlwings on their own by reviewing the xlwings API reference. We will also be separating our workflow into multiple files for readability, so please be aware that each file will be importing several of the files created throughout this lesson.
Creating utils.py
Let’s start with creating a new Python file, utils.py. In our new file, we can add all of our imports relevant for this section of the tutorial. let’s add the import for xlwings using import xlwings as xw. We will also be using the Queue object from the queue library, the Thread object from threading, and sleep from the time library. Users are also welcome to import the full library as they see fit, though for readability and runtime processing, we will only import the necessary components of these libraries.
import xlwings as xw
from threading import Thread
from queue import Queue
from time import sleep
from ibapi.ticktype import TickType, TickTypeEnum
from ibapi.client import *
from ibapi.wrapper import *
On a new line, let’s create our workbook name as a global variable – I will use BN = “Python_Excel.xlsx”. This will save the file to the same directory as the Python file; however, you can set an absolute path instead like 'C:\\Users\\awise\\Desktop\\Python_Excel.xlsx' to save the excel sheet to my desktop. I will also create a worksheet variable, LD = “Live_Data”. This should result in the following code:
 BN = “Python_Excel.xlsx”
LD = “Live_Data”
With our variables set, let’s create a method to create a workbook if one does not exist. This is an optional step as users can create the workbook directly; however, this will help establish a baseline file for us to work in. To begin, we’ll create a new method, createBook(), that we can use to build a fresh workbook if it doesn’t exist. On a new line, let’s create a variable, ‘bk’, set to a book variable, bk = xw.Book(). Next, we’ll save the workbook with bk.save(BN). And we could end the method using bk.activate(BN) though that will only establish our sheet as a current sheet.
I will instead opt to modify our sheet to avoid some relative references. So next, I will add bk.sheets.add(name=LD). This will add a new sheet to our workbook based on our prior LD variable. Optionally, you can then delete the default sheet, Sheet1, using bk.sheets(‘Sheets’).delete(). Now we can actually end our method by saving our workbook by calling bk.save(BN) once again. Our complete createBook() method should look like:
def createBook():
    bk = xw.Book()
    bk.save(BN)
    bk.activate(BN)
    bk.sheets.add(name=LD)
    bk.sheets('Sheet1').delete()
    bk.save(BN)
Going back to the root indent level, we’ll build a simple try loop to reference our file if it exists, or create the workbook if it doesn’t.
try:
    xw.Book(BN)
except FileNotFoundError:
    createBook()
Now if we move to run our Python file, we should see the workbook created in the current directory, and the first sheet labeled as “Live_Data”. Closing the workbook and returning to our utils.py file, we can get to work on some of the more interesting methods. We’re going to be building out some headers for our sheet; however, this will require a few prerequisite methods before we can get started.
We’ll start with a method to shift to the appropriate column as needed. Because Interactive Brokers tick types are centered around integer values that can be enumerated, it is best to find ways of converting an integer value to an associated column value. We’ll manage this by a new letterIncr() method that takes an integer value, letter_int, as an argument and converts it to a character using the Python chr() and ord() methods. We’ll assign the variable, incr_letter, to the ordered character value of an integer. It’s important to increment our standard value by 2 because this will resolve Python’s 0-value indexing with Excel’s 1-value index, and we will skip the first column, A, as we can use that for our Symbol column manually. After calculating the column character, we can return our incr_letter variable. The resulting method should reflect the example below:
def letterIncr(letter_int):
    incr_letter = chr(ord('@')+letter_int+2)
    return incr_letter
With our column assignment structure in place, let’s focus on writing content into our workbook. Before writing however, we want to implement the Queue class to facilitate multithreading in our program. This will allow us to write to multiple cells simultaneously instead of updating one value at a time. This concept of concurrency and asynchronicity is further discussed in our Understanding Asynchronous Libraries with TWS API article.
To implement threading for our workbook, we’ll start by assigning the variable, q, to the Queue() class object. Now, we can create an iterator for however many threads we need. I will set my range to 50 working threads, though users may want to tweak these values depending on how many symbols they would like to handle in tandem with much their computer can withstand. Then we’ll assign a new variable, t, to a thread which targets a writeToWorkbook() method along with setting the thread as a daemon. We will create the full writeToWorkbook() method momentarily. Finally, we’ll start our thread, and on the root indent level, we’ll call the join() method for q. The resulting code is displayed below:
q = Queue()

for i in range(50):
    t = Thread(
        target=writeToWorkbook,
        daemon=True
      ).start()
q.join()
Lets go ahead and create our writeToWorkbook() method. We’ll begin by creating a while loop to continuously write to the sheet, as our queue will constantly be feeding data from Interactive Brokers in just a moment. Within the loop, we’ll assign the variable, params, to q.get(). This will essentially capture all content sent to the queue. We’ll then split params into three separate variables, book, cell, and content, so we can manipulate our request as we move along. Given we’ve only received a list, we’ll capture the arguments with index positions 0, 1, and 2 respectively. Finally, we’ll reference xw.Book(BN) as our active Workbook, then declare the exact sheet with our book and cell within it’s range to set the value. We’re essentially accessing a nested reference of the workbook through xlwings’ architecture. Clients may also optionally print the params variable so they can verify the sheet’s values against the Python feed directly to observe latency issues. A final product for the writeToWorkbook() method is shown below:
def writeToWorkbook():
    while True:
        params = q.get()
        book = params[0]
        cell = params[1]
        content = params[2]
        xw.Book(BN).sheets[book].range(cell).value = content
        print(params)
Finally, much of our foundation is completed, and we can start working on displaying data within Excel. We can develop a simple buildHeaders() method to create our column headers. Reflecting on the work we’ve done, let’s put the Queue to work using q.put([LD, ‘A1’, ‘Symbol’]). This will make cell A1 equal to the value, “Symbol”. We’ll use this column to display which contracts we are working with. The method should currently appear as:
def buildHeaders():
    q.put([LD,'A1',"Symbol"])
While we will build this out further in a moment, we can test the current behavior to make sure cell A1 is assigning the Symbol value appropriately. At the bottom of the page, let’s set the name-main idiom to our new buildHeaders() method, as shown below:
if __name__ == "__main__":
    buildHeaders()
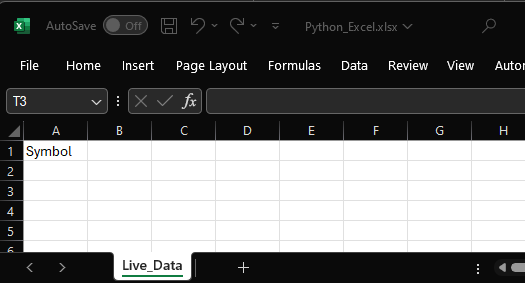
If we save and run our file, after a moment, we should see our Python_Excel.xlsx file launch, and show “Symbol” in the first column of our Live_Data sheet.
Completed utils.py
import xlwings as xw
from threading import Thread
from queue import Queue
from time import sleep
from ibapi.ticktype import TickType, TickTypeEnum
from ibapi.client import *
from ibapi.wrapper import *

BN = 'Python_Excel.xlsx'
LD = 'Live_Data'

def createBook():
    bk = xw.Book()
    bk.save(BN)
    bk.activate(BN)
    bk.sheets.add(name=LD)
    bk.sheets('Sheet1').delete()
    bk.save(BN)

def buildHeaders():
    q.put([LD,'A1',"Symbol"])
    for i in range(9):
        x = letterIncr(i)
        q.put([LD,'{}1'.format(x),TickTypeEnum.toStr(i)])

def letterIncr(letter_int):
    incr_letter = chr(ord('@')+letter_int+2)
    return incr_letter

def writeToWorkbook():
    while True:
        params = q.get()
        book = params[0]
        cell = params[1]
        content = params[2]
        xw.Book(BN).sheets[book].range(cell).value = content
        print(params)

q = Queue()

for i in range(50):
    t = Thread(
        target=writeToWorkbook,
        daemon=True
      ).start()
q.join()


try:
    xw.Book(BN)
except FileNotFoundError:
    createBook()

if __name__ == "__main__":
    buildHeaders()
Creating LiveData.py
With a working utils file in place, we can start working on generating actual data in our excel sheet. Let’s create a new file, LiveData.py. This is going to mirror the EWrapper portion of our reqMktData lesson in Requesting Market Data We can start the file by importing everything from utils with from utils import * .That way we can carry our imports in a consolidated location along with the new utility methods we just created. Then we’ll create the same TestApp class; however, we’ll remove the nextValidId method and it’s contents. So we should be left with the initializer, along with tickPrice and tickSize methods.
from utils import *

class TestApp(EClient, EWrapper):
    def __init__(self):
        EClient.__init__(self, self)

    def tickPrice(self, reqId, tickType, price, attrib):
        print(f"tickPrice. reqId: {reqId}, tickType: {TickTypeEnum.to_str(tickType)}, price: {price}, attribs: {attrib}")
    def tickSize(self, reqId, tickType, size):
        print(f"tickSize. reqId: {reqId}, tickType: {TickTypeEnum.to_str(tickType)}, size: {size}")
Since we want the data to show in Excel rather than through Python, we’ll need to modify our print statements accordingly. And in my case, I only want to deal with the first 9 tick types such as bid, ask, and last values, so I will add an if statement to both tickPrice and tickSize to only print data if the tickType variable is less than 9. Within that context, I’ll assign a column header variable, col, using our letterIncr method from before. By passing our tickType variable, I can assign the same column variable to remain under that column. Given our whatToWrite method handles assignments at the cell level, we can use the reqId variable returned by tickPrice and tickSize to label the appropriate row. This would be handled with "{}{}".format(col, reqId). This means our column is automatically set based on the tickType, while the row is set by the contract requested. And finally, we can pass the price variable directly. While it can be passed directly as a float, maintaining the values as strings can prevent invalid formatting in Excel. I’ll replicate this same structure in tickSize and the size variable. The resulting methods should appear similar to what’s below:
    def tickPrice(self, reqId: TickerId, tickType: TickType, price: float, attrib: TickAttrib,):
      if tickType < 9:
        col = letterIncr(tickType)
        q.put([LD,"{}{}".format(col, reqId), str(price)])

    def tickSize(self, reqId: TickerId, tickType: TickType, size: float):
      if tickType < 9:
        col = letterIncr(tickType)
        q.put([LD,"{}{}".format(col, reqId), str(size)])
Completed LiveData.py
from utils import *

class TestApp(EClient, EWrapper):
    def __init__(self):
      EClient.__init__(self, self)

    def tickPrice(self, reqId: TickerId, tickType: TickType, price: float, attrib: TickAttrib,):
      if tickType < 9:
        col = letterIncr(tickType)
        q.put([LD,"{}{}".format(col, reqId), str(price)])

    def tickSize(self, reqId: TickerId, tickType: TickType, size: float):
      if tickType < 9:
        col = letterIncr(tickType)
        q.put([LD,"{}{}".format(col, reqId), str(size)])
Creating pexcel.py
Now we have a utility to handle the Excel connection, and a file used to process incoming data. All that leaves is requesting the initial information. Now in the third and final file for this article, I will create “pexcel.py”. Here I will import the content of my LiveData file, which includes utils.py as well. On a new line, I will set a variable for my port. This is because I frequently transition between Trader Workstation Paper Trading, and IB gateway, so having a variable hosted at the top of my page allows me to easily modify my connection. Next, I can create a reference to our buildHeaders() method to make sure the headers are built on connection. Then, I create our app connection and contract parameters. This is similar to the content of our nextValidId() method removed from the LiveData.py file.
from LiveData import *

port = 7496

buildHeaders()
app = TestApp()
app.connect("127.0.0.1", port, 100)
Next, we’ll look to implement some additional threading so our client system can create several concurrent requests and avoid getting caught in the run loop. To do so, we’ll sleep for a second before using our Threading library to once again run the app.
sleep(1)
Thread(target=app.run).start()
sleep(3)
Now, we can essentially copy in the content from the old nextValidId(). We can copy over the mycontract, Contract Object, but leave off the symbol. I’d like to work with a specific set of symbols, AAPL, IBKR, TSLA, and MSFT, so I’ll assign them to a list variable, symbols. Our pexcel.py file should now include:
mycontract = Contract()
mycontract.exchange = "SMART"
mycontract.secType = "STK"
mycontract.currency = "USD"

symbols = ['AAPL', 'IBKR', 'TSLA', 'MSFT']
We can now look to enumerate through these items to retrieve the symbol and request ID to be tracked throughout the program. We’ll use for enumer,symbol in enumerate(symbols): to specify both our enumeration value and the direct symbol from our list. I’ll then increment the enumer variable by two to once again resolve the indexing difference and the header issue. Then, I can set my contract’s symbol variable to the new symbol variable from our enumerator. I can then write these symbols to specific rows using a similar structure as before in our q.put() method. And finally, we will create a market data request just like in the prior tutorial series but referencing our app instead of self, and then our enumerator as the request ID and mycontract as my contract variable. The full enumerator should appear as the following:
for enumer,symbol in enumerate(symbols):
    enumer += 2
    mycontract.symbol = symbol

    q.put([LD,"A%s" % enumer, symbol])

    app.reqMktData(
        reqId=enumer,
        contract=mycontract,
        genericTickList="",
        snapshot=False,
        regulatorySnapshot=False,
        mktDataOptions=[],
    )
And that concludes all of the coding in this lesson. Once you have saved all three of your files, you can now successfully run pexcel.py. The code should now launch an Excel file, Python_Excel.xlsx, with a newly created sheet, Live_Data, and a 10×6 table indicating all of the headers we created from the tickType enumeration, all of the symbols we have requested data for, and a live feed of market data related to each column-row pair. The gif below should show an approximation of your own sheet’s behavior.
Completed pexcel.py
from LiveData import *

port = 7496

buildHeaders()
app = TestApp()
app.connect("127.0.0.1", port, 100)

sleep(1)
Thread(target=app.run).start()
sleep(3)

mycontract = Contract()
mycontract.exchange = "SMART"
mycontract.secType = "STK"
mycontract.currency = "USD"

symbols = ['AAPL', 'IBKR', 'TSLA', 'MSFT']
for enumer,symbol in enumerate(symbols):
    enumer += 2
    mycontract.symbol = symbol

    q.put([LD,"A%s" % enumer, symbol])

    app.reqMktData(
        reqId=enumer,
        contract=mycontract,
        genericTickList="",
        snapshot=False,
        regulatorySnapshot=False,
        mktDataOptions=[],
    )
With all of that being said, thank you for reading through the inaugural article on operating Excel through Python. Users who may be having difficulties with the code formatting, or would simply like to verify their code’s behavior are welcome to review our github repository for the first lesson. In future lessons, we plan to send requests from the Excel interface into Python, as well as manage other functionality of our original series such as requesting contract information, placing orders, and more. Please feel free to leave any comments or questions on the series in the comments section and we will look to provide more information on Python with Excel as soon as possible.
Join The Conversation
If you have a general question, it may already be covered in our FAQs. If you have an account-specific question or concern, please reach out to Client Services.
Leave a Reply
Disclosure: Interactive Brokers
The analysis in this material is provided for information only and is not and should not be construed as an offer to sell or the solicitation of an offer to buy any security. To the extent that this material discusses general market activity, industry or sector trends or other broad-based economic or political conditions, it should not be construed as research or investment advice. To the extent that it includes references to specific securities, commodities, currencies, or other instruments, those references do not constitute a recommendation by IBKR to buy, sell or hold such investments. This material does not and is not intended to take into account the particular financial conditions, investment objectives or requirements of individual customers. Before acting on this material, you should consider whether it is suitable for your particular circumstances and, as necessary, seek professional advice.
The views and opinions expressed herein are those of the author and do not necessarily reflect the views of Interactive Brokers, its affiliates, or its employees.
Disclosure: Order Types / TWS
The order types available through Interactive Brokers LLC's Trader Workstation are designed to help you limit your loss and/or lock in a profit. Market conditions and other factors may affect execution. In general, orders guarantee a fill or guarantee a price, but not both. In extreme market conditions, an order may either be executed at a different price than anticipated or may not be filled in the marketplace.
Disclosure: API Examples Discussed
Throughout the lesson, please keep in mind that the examples discussed are purely for technical demonstration purposes, and do not constitute trading advice. Also, it is important to remember that placing trades in a paper account is recommended before any live trading.
Thanks for the first lesson. Really liked it. Waiting to see how we could extract all the options strikes and the mid or bid/ask prices for a given index (e.g. SPX) and its Greek values.